VIVO Tempered Glass PC Case
Product Video for VIVO
- Project Goal: Create
- Role(s): Director, Camera Operator, Editor, Motion Graphics Designer
- Date Released: June 16, 2017
I made this video for a VIVO product which is no longer available (you can still find the page on Amazon though) – it was the company’s first foray into gaming accessories, and at the time the only quality budget option for a tempered glass PC case.
Here’s how I made the video.
PREPRODUCTION
Start with Research
The first thing I did on this product video was research how the industry normally approached their marketing. For consumer computer parts at the time, there wasn’t a lot of video content, mostly images. But I was able to look over a lot of videos focused at the same target market: PC Gamers.
Alienware, Apple, Gaming accessory brands – their videos tended to be very high contrast, focusing on the colors on a black background. A lot of smooth product shots, a lot of closeups to show off texture… most of these videos were 3D renders, so the medium lent itself to these aesthetics.
I decided to keep the high contrast look, but on a white background (to fit with the existing VIVO brand) and set myself to attempt the smooth digital look in camera instead of 3D.
Storyboards
While I don’t do it as much now, in the beginning I would storyboard everything. This forced me to really think through each shot and how it links to the next one, drawing the eye of the audience on a consistent and smooth journey.
In a video concept like this one, I knew I would have a wide shot of the whole case which would then go into closeups of each feature point. So form that framework, I storyboarded out the best order with which to approach each feature, and sketched out an approximate angle to emphasize the features.
PRODUCTION
Getting the PC case shot ended up being an interesting challenge – the giant tempered glass panel wanted to reflect everything.
The solution? Set up every black backdrop, popup, and reflector we had in a semicircle around the turntable/cyc backdrop – and lift up the soft box lights on the stands so that they lit the case over these negative fills. The camera was stuck through hole in this semicircle:
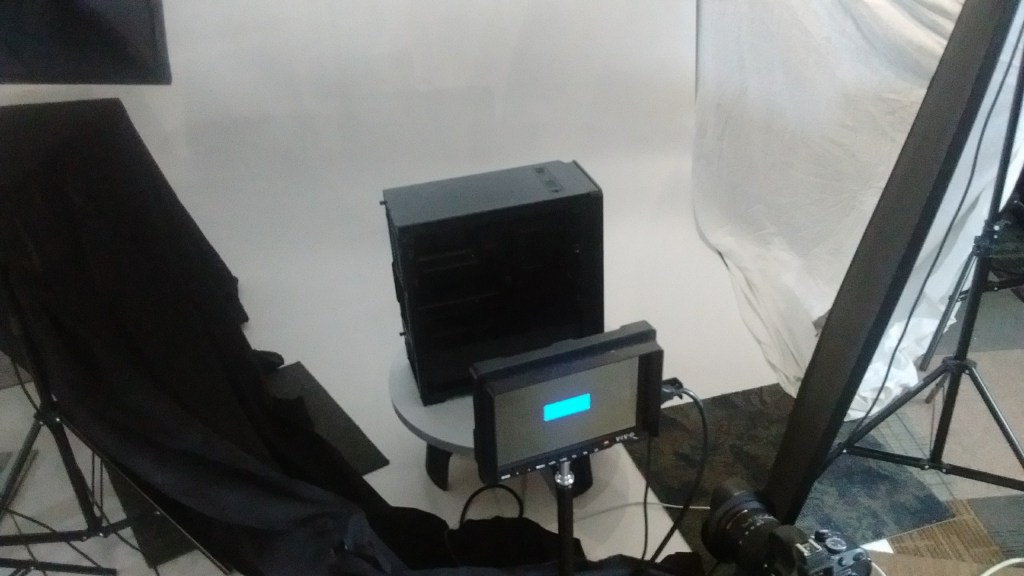
This stopped any of the lights or the rest of the studio/office reflecting in the glass, and gave the super clean look I was trying to emulate in 3D product videos.
I shot this one on a low end Nikon DSLR and with some amazon basics soft boxes – we didn’t have much of a studio at this point, and I was essentially repurposing photography equipment to try and make high end videos. If you have extra time, you can absolutely shoot on less than ideal gear and get stellar results.
EDITING
To get the smooth white background (especially in the wide shots) I used a method I stole from a product photography blog – but something I apply in After Effects instead of Photoshop.
I took the shot in one layer, added a threshold effect, and then used that layer as luma matte for the shot in another layer. Some adjustments, a white solid, some masking, and color grade, viola! You’ve got a super clean white background, on a moving video, that looks like it was shot in a high end studio and rotoscoped by hand. Note: this works best with darker colored objects, mileage may vary.
Because the turntable would move at consistent rate, I could also line up multiple takes for fun fade effects. To line up these shots, I turned on “difference” mode to line up the layers, and then I could animate the transition between them.
This is still one my favorite videos I’ve made, and I think it still holds up all these years later – except for the text popups, those are a bit dated.
